It snowed so hard today and I am stuck inside. My DIY side got itchin' for something to do. I just recovered two photo frame mats, and now want to do something with this frame I have had for a while in my closet. The glass on it broke.
 This project requires a little more work but not much (as you know I do not like projects that hurt your brain). And the result is so beautiful!


Do a mock up of how it will look except for the moss. I always need to visually see that a DIY project I am working with will work.


I think this project would make a great gift for anyone getting married, or having a baby!
Below is step by step instructions on how I created this look. BUT you can substitute pieces of it to make it more original to you. Don't be afraid to have fun with it!
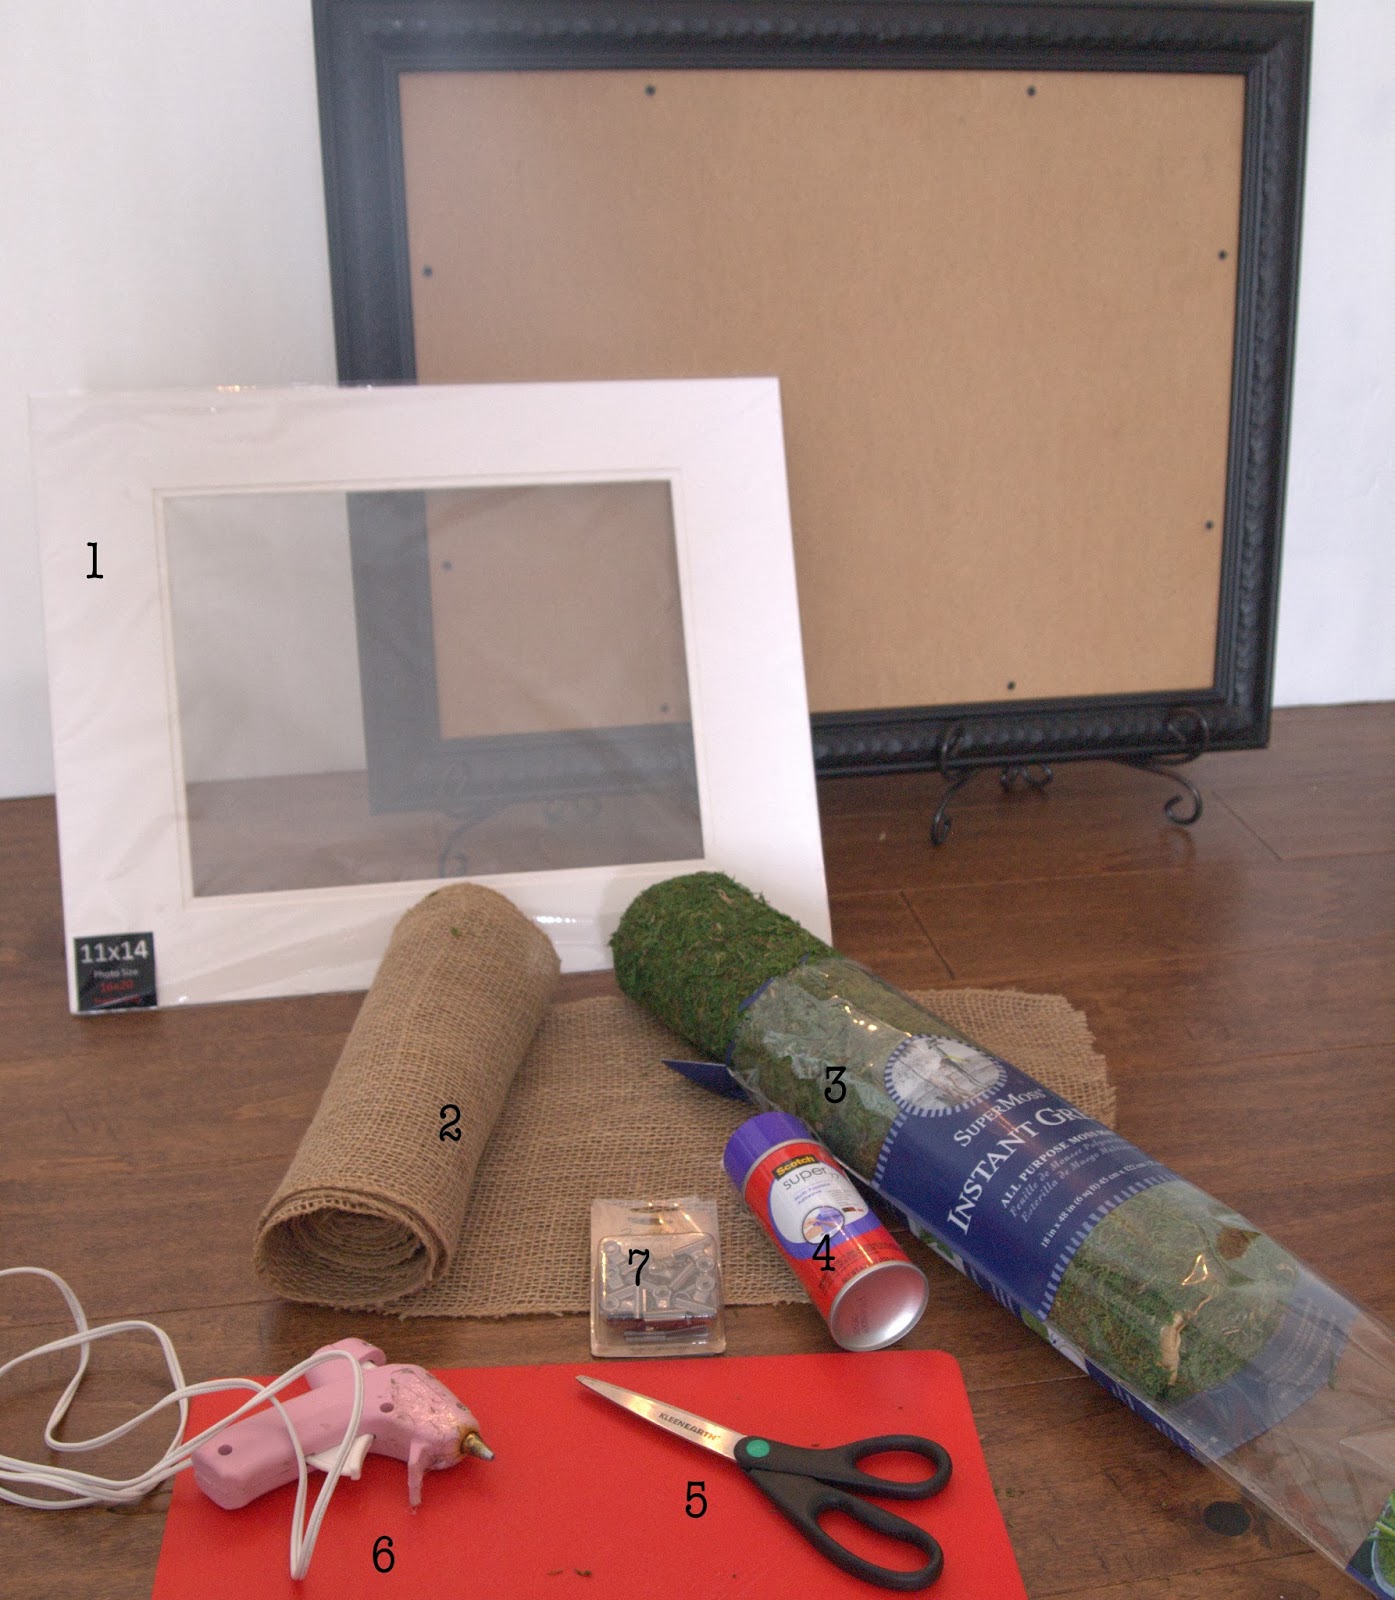
Supplies you need:
1. Mat
2. Burlap as wide as the mat opening (you can substitute this for any fabric or pretty paper).
3. Super Moss All Purpose Moss Mat (from Walmart, Joannes or Hobby Lobby)
4. Scotch All Purpose Self Adhesive (I love this stuff!)
5. Scissors
6. Hot glue gun
7. Hinge clips
STEP 1
- Keeping the back of the frame on (NO GLASS), place the burlap on the frame cut it to the size of the inside of the frame like below.
Do a mock up of how it will look except for the moss. I always need to visually see that a DIY project I am working with will work.
STEP 2
- Spray your adhesive on your burlap piece then place it centered in the frame.
STEP 3
- On a clean surface, spray the backside of the mat with the all purpose adhesive glue.
STEP 4
- Turn the mat right side up and center the mat on the frame. Press down with your hands to get glue to stick.STEP 5
- On a large clean surface open the moss. Be aware that the moss can get the area you are working on messy.
The back of the moss looks like this. It's a sheet and SO EASY to cut with scissors!
STEP 6
- Measure the length and width of the frame like below so you know how long to cut the moss.
And measure how wide you want your moss to be (for my frame ( chose 3 inches).
STEP 7
- Cut your moss based on your measurements.
STEP 8
- Remove the paper from the back of the sheet you cut.
STEP 9
- Spray the back of each long piece of moss and place along the long inside areas of the frame as shown below.STEP 10
- Test the shorter moss pieces and cut off excess. Spray the backs of the pieces and glue down.
The frame will look like this!
Here is a close up of it!
STEP 11
- Place your photo where you want it to be on the frame with the clip.
Mark the spot and hot glue the clip in place.
STEP 12
- Add the photo to the clip.
I added a Martha Stewart Chalk Label from Staples and cut it to fit. I wrote the year the photo was taken with chalk. Then peeled off the back and placed it on the frame.
Here is how it looks!
Here are the two other DIY frame mats I worked on today! Want to get instructions on how easy it was to do these also?
Comments