BEFORE AFTER
So long 1970s pepto pink! We finally completed our master bathroom renovation! Jumping for joy because no longer sharing my daughters bathroom. Its a small space but really works hard for us.
BEFORE AFTER
Its been a bit of a process from demo to tile install, but we are done! Party time!
STEPS TO COMPLETE THE MAIN AREA
Demo and new dry wall.
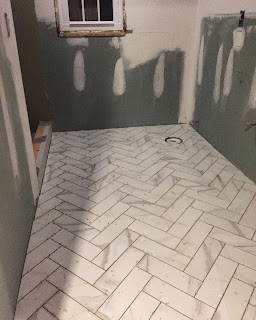
Added radiant heat to floor then began tile work. I worked hand in hand with the tiler to make sure the tiles were forming nicely in a herringbone pattern on the floor, and the key is to use tiles next to each other that don't have a similar pattern/veining (good tip when using machine made tiles).
Floor is done!
Walls are done!
The bathroom is small so we used the same tile throughout to keep it bright and expansive looking. BUT we did 'shake it up' in varying lengths and patterns of that tile. The floor and wall tile above chair rail are long narrow pieces (herringbone pattern on floor and random on wall). The tile used below the chair rail, and walls of shower are larger pieces.
I wanted to use calacatta marble for the entire project but the price tag was beyond my budget, so I only used it for the chair rail, floor of the shower and pattern on the back shower wall. After a lot of research, I found a man made tile I liked that looked similar, and I am happy with it.
Good bye shell sink......
Vanity is in!
We needed a 60 inch double vanity. I found this one and liked how the marble looked that came with it. Also looks like a piece of furniture with its tall legs, that gives the room a more open feel because it is a small space. HERE IS THE LINK. We changed out the knobs to crystal because every room needs a little bling!
Bling bling!!
BEFORE
AFTER (new knobs)
We have array of lighting options now. The chrome wall sconces with fabric shades for ambiance lighting, two recessed lights above the vanity for more direct light (I preferred this vs using wall sconces above the vanity because I have under 8 foot ceiling and would have felt squatty). Also a light in the shower and fan light.
We used satin nickel for the faucets and shower plumbing. I like mixing chrome and nickel. I don't prefer chrome everywhere because of the shininess, but used together, looks nice.
To get the mirror size right, I found a few options then taped them out on the wall using painters tape. This is a good tip for visualizing the size before purchasing!
STEPS TO COMPLETE THE SHOWER
BEFORE AFTER
Good bye sunken square tub!
New work begins!
I instantly fell for this marble mosaic tile. I wanted to keep the shower clean and light but give it one powerful POP! And our dog Carmella approved!
Definitely had to have wall niches. I chose two to maximize function. The taller one is perfect for our shampoo and conditioner and body wash. And the lower shelf holds soap and razors neatly.
I used the basket weave marble mosaic tile for the back of the niches. This is the tile I used on the shower floor also. For the sides of the niche, I used calacatta marble that had a lot of gray veining.
One more look at the shower.
Thats it! We still want to use a wallpaper on the walls but decided to paint it now and get back around to the paper later. We finished the space off with crown molding.
Next project is our basement (my daughters bathroom will be in 2018; she has a baby blue 1970s look right now)
(you need bell bottom jeans in this room)


Comments